Tutorial 6: Multiverse Connector in ROS
This tutorial demonstrates how to use the Multiverse Connector in a ROS (Robot Operating System) environment.
Important
ROS experience: This tutorial assumes you have basic knowledge of ROS and have it installed on your system.
In this tutorial, you will:
Start a robot simulation in MuJoCo with the Multiverse Connector plugin.
Run ROS nodes as Multiverse Connectors to interact with the simulation.
Note
This tutorial uses MuJoCo as the simulation environment, but you can choose any simulator that has Multiverse Connector plugins (see Unreal Engine, Isaac Sim and Gazebo tutorials).
Key Concepts

Multiverse Server: The central hub that coordinates communication between simulators and controllers in real time.
Multiverse Client: A base program (C++ with Python bindings) that connects to the Multiverse Server to send and receive data.
Multiverse Connector: A specific implementation of a Multiverse Client that connects to a particular simulator or controller.
Getting Started
Clone or download the following repositories to your local machine:
git clone https://github.com/Multiverse-Framework/Multiverse-ServerClient.git
git clone https://github.com/Multiverse-Framework/Multiverse-ClientPy.git
git clone https://github.com/Multiverse-Framework/Multiverse-ROS-Connector.git
Note
No Git? Open each repository on GitHub, click Code → Download ZIP, and extract the archives locally.
Build the ROS workspace for the Multiverse ROS Connector:
For ROS1 (Noetic):
cd <path/to/Multiverse-ROS-Connector>/ros_ws/multiverse_ws
rosdep install --from-paths src --ignore-src -r -y
catkin build   # or catkin_make
For ROS2 (Foxy, Humble, Jazzy):
cd <path/to/Multiverse-ROS-Connector>/ros_ws/multiverse_ws2
rosdep install --from-paths src --ignore-src -r -y
colcon build --symlink-install
Start the Multiverse Server
Start the Multiverse Server by running the following command in a terminal:
cd <path/to/Multiverse-ServerClient>/bin
./multiverse_server
The Multiverse Server should now be running and waiting for Multiverse Clients to connect. The default port is 7000. The following output should appear in the terminal:
Start Multiverse Server...
[Server] Create server socket tcp://*:7000
[Server] Waiting for request...
Start a Robot Simulation with the Multiverse Connector Plugin
Choose a robot model from the MuJoCo Menagerie and download it locally.
In this tutorial, we use the Hello Robot Stretch 3 model, but you can use any MuJoCo model.
Append the following XML snippet to the end of the MuJoCo model file (e.g. scene.xml) to enable the Multiverse Connector plugin:
<extension>
    <plugin plugin="mujoco.multiverse_connector">
        <instance name="mujoco_client">
            <config key="host" value="tcp://127.0.0.1" />
            <config key="server_port" value="7000" />
            <config key="client_port" value="7500" />
            <config key="world_name" value="world" />
            <config key="simulation_name" value="scene_simulation" />
            <config key="send" value="{'body': ['position', 'quaternion'], 'joint': ['joint_angular_position', 'joint_linear_position', 'joint_angular_velocity', 'joint_linear_velocity', 'joint_force', 'joint_torque'], 'sensor': ['scalar']}" />
        </instance>
    </plugin>
</extension>
This configuration streams all body poses, joint states (positions, velocities, forces, torques), and sensor data to the Multiverse Server. You can customize the send parameter to include or exclude specific data.
Start the MuJoCo simulation with the Multiverse Connector plugin (ensure MuJoCo is installed and the plugin is properly configured, see tutorial_2.html#getting-started):
<path/to/mujoco>/bin/simulate <path/to/your/model>/scene.xml
The simulation should now be running and transmitting data to the Multiverse Server.
Start the Multiverse Connector in ROS
Launch the ROS node for the Multiverse Connector in a new terminal.
First, extend your PYTHONPATH with the multiverse_client_py package:
export PYTHONPATH=$PYTHONPATH:<path/to/Multiverse-ClientPy>
Next, source the corresponding ROS workspace:
For ROS1 (Noetic):
cd <path/to/Multiverse-ROS-Connector>
source ros_ws/multiverse_ws/devel/setup.bash
For ROS2 (Foxy, Humble, Jazzy):
cd <path/to/Multiverse-ROS-Connector>
source ros_ws/multiverse_ws2/install/setup.bash
Finally, start a ROS node that publishes the tf tree for the full environment:
python3 scripts/multiverse_ros_run.py --publishers="{'tf': [{'meta_data': {'world_name': 'world', 'length_unit': 'm', 'angle_unit': 'rad', 'mass_unit': 'kg', 'time_unit': 's', 'handedness': 'rhs'}, 'port': 7300, 'topic': '/tf', 'rate': 60, 'root_frame_id': 'map'}]}" --subscribers="{}"
This command connects to the Multiverse Server on port 7300 and publishes the tf tree to the /tf topic at 60 Hz. You can extend the –publishers and –subscribers arguments to integrate other ROS nodes.
For more details, see multiverse_publishers and multiverse_subscribers.
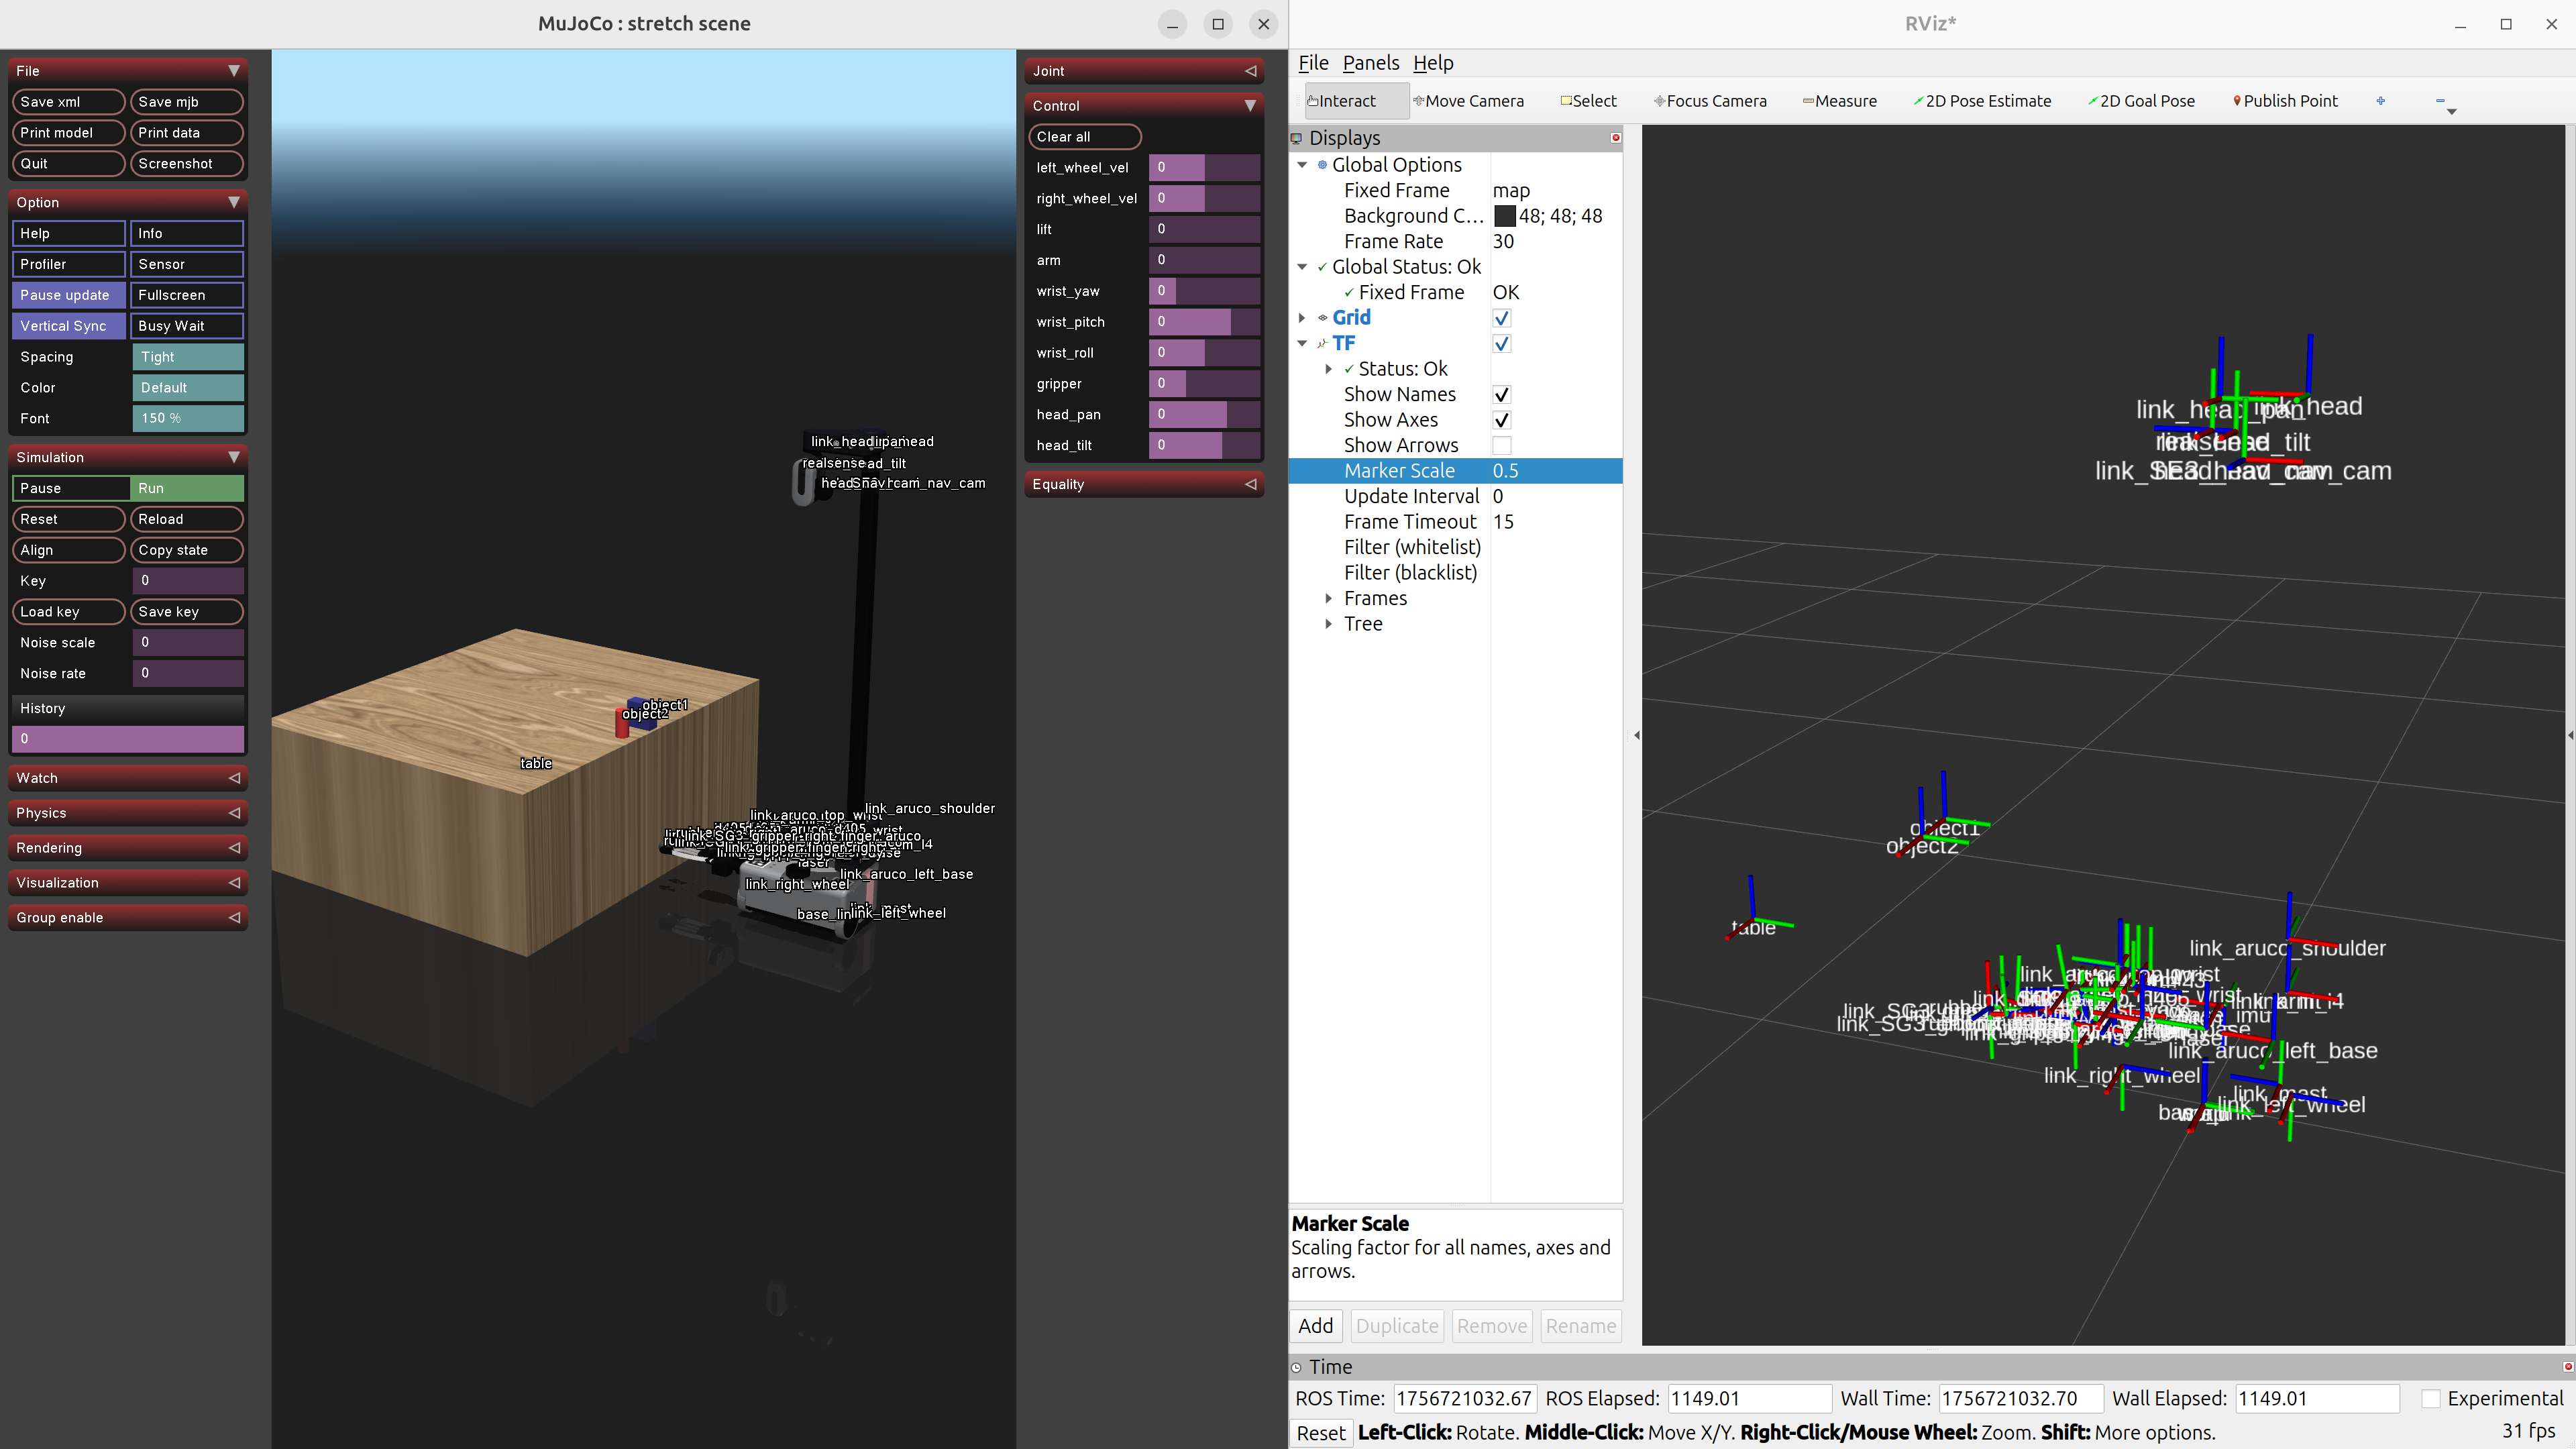
(Optional) Visualize the robot in RViz (for ROS1) or RViz2 (for ROS2):
For ROS1 (Noetic):
source /opt/ros/noetic/setup.bash
rosrun rviz rviz
For ROS2 (Foxy, Humble, Jazzy):
source /opt/ros/<distro>/setup.bash
ros2 run rviz2 rviz2
Add a TF display in RViz and set its topic to /tf to visualize the robot’s pose in real time. The visualization should look like this:
Controlling the Robot with ros_control / ros2_control
Modify the extension section of the MuJoCo model file to writing actuators for the robot joints.
<extension>
        <plugin plugin="mujoco.multiverse_connector">
                <instance name="mujoco_client">
                        <config key="host" value="tcp://127.0.0.1" />
                        <config key="server_port" value="7000" />
                        <config key="client_port" value="7500" />
                        <config key="world_name" value="world" />
                        <config key="simulation_name" value="scene_simulation" />
                        <config key="send" value="{'body': ['position', 'quaternion'], 'joint': ['joint_angular_position', 'joint_linear_position', 'joint_angular_velocity', 'joint_linear_velocity', 'joint_force', 'joint_torque'], 'sensor': ['scalar']}" />
                        <config key="receive" value="{'lift': ['cmd_joint_angular_position'], 'arm': ['cmd_joint_angular_position'], 'wrist_yaw': ['cmd_joint_angular_position'], 'wrist_pitch': ['cmd_joint_angular_position'], 'wrist_roll': ['cmd_joint_angular_position'], 'gripper': ['cmd_joint_linear_position'], 'head_pan': ['cmd_joint_angular_position'], 'head_tilt': ['cmd_joint_angular_position']}" />
                </instance>
        </plugin>
</extension>
The receive parameter defines which actuator commands are accepted for the robot joints. Ensure that the actuator types match the joint definitions in your robot model (e.g., use cmd_joint_angular_position for revolute joints, cmd_joint_linear_position for prismatic joints, and scalar for tendons).
Restart the MuJoCo simulation to apply the updated configuration:
<path/to/mujoco>/bin/simulate <path/to/your/model>/scene.xml
The Multiverse Server should now be waiting for controller commands.
Control the robot with ros_control or ros2_control:
To set up either ros_control or ros2_control, you need at least two configuration files:
Robot Description (URDF or XACRO): Defines the robot’s physical structure (links, joints, etc.). This must be consistent with the robot used in the MuJoCo simulation—at minimum, the controlled joint names must match.
Controller Configuration (YAML): Specifies which controllers to run (e.g., position, velocity, or effort controllers).
For ROS1 (Noetic) with ros_control: not documented yet.
For ROS2 (Foxy, Humble, Jazzy) with ros2_control:
In this tutorial, we use the following URDF and YAML files for the Hello Robot Stretch 3 model:
URDF file: stretch.urdf
YAML file: stretch_ros2_control.yaml
Download these files and modify them as needed for your robot model.
Publish the robot description to the ROS topic /robot_description in a new terminal:
source /opt/ros/<distro>/setup.bash
ros2 run robot_state_publisher robot_state_publisher --ros-args -p robot_description:="$(xacro <path/to/your/urdf>stretch.urdf)"
Launch the controllers using the controller_manager in another terminal:
source <path/to/Multiverse-ROS-Connector>/ros_ws/multiverse_ws2/install/setup.bash
ros2 run controller_manager controller_manager --ros-args --params-file <path/to/your/yaml>/stretch_ros2_control.yaml
Spawn the necessary controllers (e.g., joint_state_broadcaster and joint_trajectory_controller) in another terminal:
source /opt/ros/<distro>/setup.bash
ros2 run controller_manager spawner -p <path/to/your/yaml>/stretch_ros2_control.yaml joint_state_broadcaster joint_trajectory_controller
(Optional) Open rqt_joint_trajectory_controller to send trajectory commands to the robot in another terminal:
source /opt/ros/<distro>/setup.bash
ros2 run rqt_joint_trajectory_controller rqt_joint_trajectory_controller
Now the robot in the MuJoCo simulation should respond to the trajectory commands sent from rqt_joint_trajectory_controller. The result should look like this:

Conclusion
Congratulations! You have successfully integrated the Multiverse Connector with ROS to control a robot in a MuJoCo simulation. You can now extend this setup by adding more ROS nodes, sensors, and controllers to create complex robotic applications.
Next Steps
Use Multiverse Connector in MATLAB as a S-Function: Tutorial 7: Multiverse Connector in MATLAB